A brief history of Photography.
During the 16th Century, many artists grew an increasing interest in capturing, creating and representing reality. In particular, Leonardo Da Vinci had a great passion for intricate and anatomically accurate sketches and images, drawing inspiration and knowledge from the advances in science.
Realism became very popular amongst artists therefore contraptions where created in order to effectively create the perfect representation of an aspect of life. For example, the Camera Obscura was invented in the year 500 BC. It consisted of a darkened area where an inverted image was projected onto a flat surface, using a small hole to allow the light to filter through. These became attractions for the general public to come and view and marvel at the flat image. This was different from the Camera Lucida, a much smaller contraption, this was used to aid the artist by using a mirror to superimpose a direct view of both the drawing surface and the object being drawn.
Before the 19th Century the technological advances from the industrial revolution brought about the first definite still image. In 1827 the scientist Joseph Niepce used a piece of chemical soaked parchment to create the view from out of his window by allowing the chemicals to be affected by the light outside, changing the tones and shades on the parchment. A man called Louis Daguerre worked with Niepce in order to achieve a fixed projected image, using this to create sets and dioramas.
In the January of 1839, Daguerre invented the Daguerreotype. A form of photograph made from an etching in metal.
Also at this time, William Fox Talbot developed the Calotype, this could be used to produce many more images then the Daguerreotype, however was of lower quality. The two competed in popularity, with the Daguerreotype in the lead due to its superior resolution, but over time, as paper technology advanced so did the Calotype, thus overtaking Daguerre's invention.
Talbot also created photogenic drawings by placing things on photographic paper and using light to create an image of the object.
At the beginning of photography, the photographers where mainly focused on documentation and capturing events and life, mainly using the themes of portrait and landscape, however this changed greatly over the years, with photographers becoming much more artistic, and finding new and innovative ways of expressing themselves through the photography medium.
|

|

|

|

|
10th September 2014.
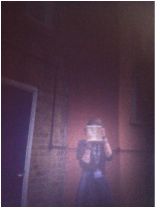
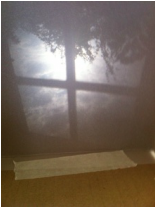
Camera Obscura comes from the Latin words that mean 'Darkened Room'. This is because it uses a darkened area, or room, with a small aperture of light to create an inverted image of whatever is outside of the area. It was one of the first methods of creating an image, commonly viewed as tourist attractions in. These can be made, very simply, by making a box with a small aperture in one end, placing a lens over this aperture and then fixing tracing paper to the other end, closing off the box. This means that when the lens and hole are held in front of a bright area, an inverted image of that location will be projected onto the tracing paper. The focus can be adjusted by moving the tracing paper backwards or forwards away from the lens. When the 'Camera Obscura' was in total darkness, we found that the picture on the other side was clearer, with visible colours, as there was no light interfering with our ability to see the tracing paper.
We could also adjust the focus and zoom of the image by moving the tracing paper backwards or forwards. Moving the paper forwards would make the image clearer, and therefore more in focus, fixing it in place maintained the focus, however it meant closer images would be blurred as the focal length was much father away.
|
|
|
|
11th September 2014.
The photogram was one of the first methods of creating a fixed image. It consists of exposing photographic paper to white light and placing objects between the paper and the light. Because the paper is coated with a light sensitive chemical the areas the light cannot hit remain white, whilst the other areas turn black, this creates an outline of whatever was blocking the light. The paper is then placed in a series of chemicals to develop, stop and fix the image in place so it will not fade when in direct sunlight. The visibility of the object depends on how long the photogram is in the developing fluid, and how long it is exposed to the light.
A test can be done in order to see the best exposure time for the photogram, called a block test. This is where a piece of black card is held over the paper and moved back at intervals of one second. The areas that where exposed to the light the longest, tuned a much darker colour and where less visible. Other factors such as the opacity of the object will also affect the way the photogram turns out, as the more opaque the object the less light can bleed through and the bolder the image. The image would be more translucent if there was more of a chance for the light to flow through, for example, I tested with tracing paper by drawing an image to see if this image would show up. I also tested with negatives from photographs, which showed up very brightly as developed photographs as the light was caught by the dark areas causing a clear photograph to show through.

|

|

|
|
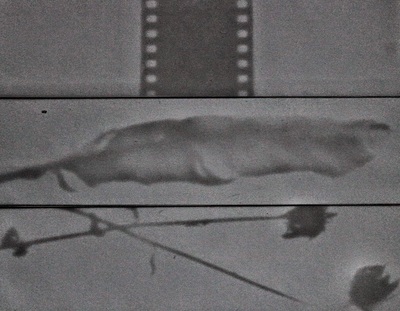
One incredibly famous photographer who worked with photograms was Man Ray. He was an American modernist, who spent most of his career in france,creating photograms which he called 'rayographs' in reference to himself. He focused on creating images with everyday objects such as coils of wire and pins etc. This avant-garde approach to seeing put Man Ray on the map as a symbol for many surrealist writers, painters and poets.
|

Raypgraph
|
|
16th September 2014.
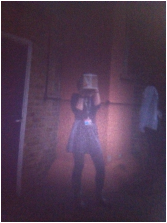
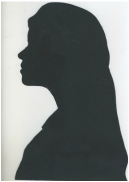
When creating photograms one must think creatively about the different ways to create the image. Side on photographs can be taken, and then made into silhouettes by fixing them to black card and cutting round them with a Stanley knife. This way either the silhouette itself can be used or the outline to create either a dark head on a light background or vice-versa. in order to do this the distance from the white light had to be larger so that the whole image would fit inside. This meant that more test strips had to be made because, as you raise the enlarger height, the longer the photogram requires to develop into the clearest possible image. However you must be careful in assuring the quality of your chemicals, as dirty chemicals will case grey marks to form on the photogram. |
|
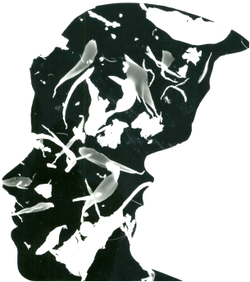
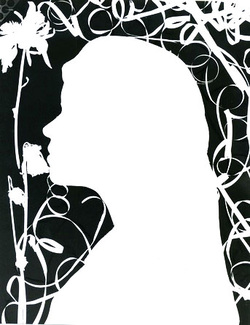
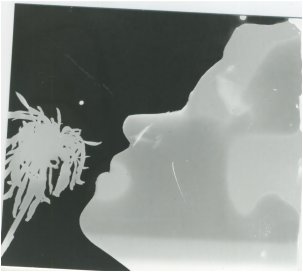
Jocelyn Carlin is noted for her work with silhouettes in photograms, however, her work was more unconventional, using objects and materiels to create the illusin of the human face. These images showed a very imaginative approach to photograms giving the audience a new way of looking at the human face, as it demonstraited and inspired an ability to see 'otherness' in everyday items, or find representatins ofhuman life in the mundane.
(See how in this image she has used lace to create a wisped effect, perfectly mimiking the grace and elegance of human hair, the meterial also connotes a fragility and intricate beauty, enforcing a vey fairytale and romanticised veiw upon this face.) |

Jocelyn Carlin- Photogram
|

|
|
Family Portraits.
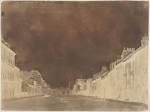
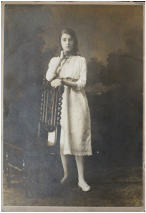
There is a great contrast between the family photos of the past, and that of those today. Fundamentally, this could be because of the evolution of technology. For example, back when cameras where first invented, a family photograph or portrait would have been done purely out of wonderment at the new technology, as part of a craze for documenting what they looked like or for decoration of the house. However nowadays, photographs are to easy to take that we use them to document many different things, from special occasions to pictures of food. This contrast is highly evident in the composition of photographs from then and now.
|
For example, in this image we see a woman positioned very carefully by an ornately carved chair, perfectly framed in the centre of the picture, as it was taken to document her existence. The rest of the frame is largely empty, drawing lots of focus in on her, however it has a landscape pained on the wall behind. This image would have been meticulously designed so as to make an attractive picture to hang in a house, careful planning would have also gone into the picture as it would have been a rare and expensive opportunity to capture the lives of these people. The expression on her face is also very serious, as she would have had to stand ver still for a long period of time, as the camera needed an extensive amount of exposure in order to form an image, vastly more than the photographs taken today.
|
|
|
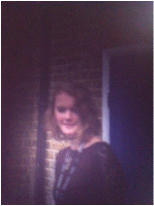
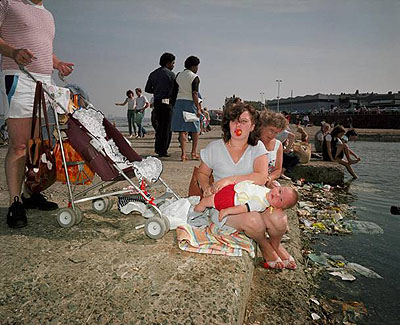
However in this second image we see that the primary focus is on the people in the photograph with very little or no attention to the composition of the background. This is because the photograph would have been taken purely to capture that specific moment in time as photographs can be taken continuously with no real need or necessity. The lighting in more modern family photographs is also much more natural as they are usually representative of the place and time that the people where in so as to preserve the memory, other than being taken with flattering mood specific lighting designed to make the image an attractive, decorative item. The expressions are much more relaxed and genial making it easy to identify an extreme difference in the length of time the photo took to take.
|

|
|
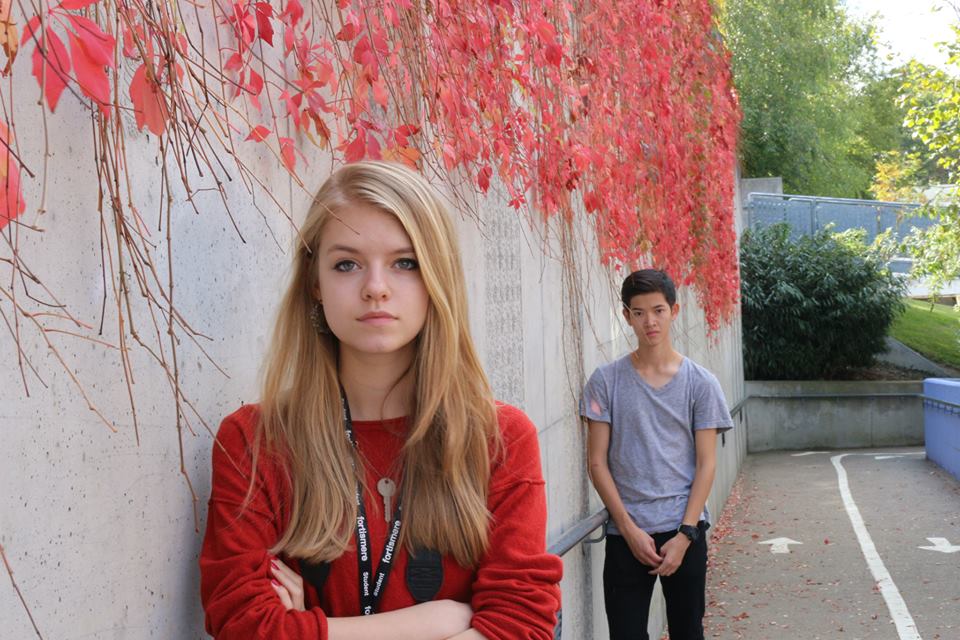
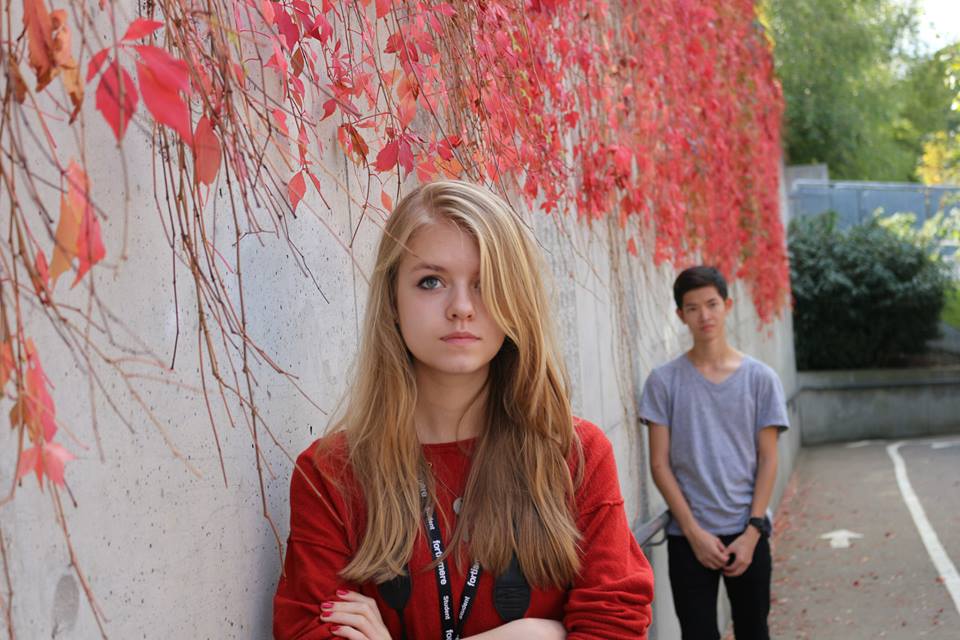
Reading Photographs.
As a photographer it is very important to understand how to read images. All photographs taken by professional photographers will have some form of meaning behind them, be it ambiguous or perfectly plain. For example, at first glance, this image appears to be a perfectly ordinary image of a family on holiday, however, on further inspection one begins t notice the subtle negative indications. All expressions are slightly pained and worried, the baby lyes in a vary rigid and uncomfortable position, and the ground is littered with debris and pieces of paper. The image was taken when the recession was in full swing, therefore the artist wanted to capture the discomforting effect it had on innocent holiday makers and convey the way that the extreme mistrust of the government and of Thatcher left people feeling unsafe, symbolised in the hard ground and cold sky, the occupants are also lit with a wash of harsh light, unlike those around them adding to this feeling of exposure. This basic example demonstrates the way in which photographs can be read, searching for symbolism and meanings behind every aspect, combined with the context of the image to discover the essence of the photograph. |
|

|
To fully 'reads a photograph you must really get into the mindset of the photographer, fully emaging the process that went in to its composition. You must consider the lighting, mise-en-scene, materiels used, angles taken, framing etc. as all these things where a part of the photographers vision and are therfore intewntionally desighned y=to express a message. For example, in this image of 'Identicle Twins' at first, all we see are i dentical twins, however on furthur analysis we can see diffarences, their arms are diferent lengths, their collars are not the same, one is smiling the other looks forlawn. We can also see that the pathway in the background is not semetrical, unusual as you would expect a photograph of twins to have perfect balance, this and other subtle diffarences suggest that the photorapher is trying tyo show these girls diffdarences from eachother, making it clear that they are individuals, and not just mirror images, perhaps making a point about the way twins, especially children, are veiwed by the world.
|
19th September 2014.
With Photograms, there are a number of different techniques to create images. The first is a moving image. Not a video, but an object placed under the light and then moved at short intervals. In doing this one creates a replicated image of one object, where the positions overlap, the concentration of the whiteness becomes more intense. However, care must be taken in the adjustment of the size of the aperture, as the photogram needs less time under the light because of the repeated exposure. Therefore the aperture must be very small in size so that the white light will not instantly darken the entire image. The second is a sandwich. This is where an already developed photogram is placed over a fresh piece of photographic paper, both under a sheet of glass. This means that an inverted form of the developed photogram appears on the fresh paper. The third is called Polarisation. This is the most complex, as it involves placing the photogram under the white light, then inserting it into the developing fluid, and then very quickly transferring it back to the enlarger and placing under the light once again for the same amount of time it was in the fluid. This should create a silvery line around aspects of the image, because the insides of the white areas will slowly begin to grey.
With Photograms, there are a number of different techniques to create images. The first is a moving image. Not a video, but an object placed under the light and then moved at short intervals. In doing this one creates a replicated image of one object, where the positions overlap, the concentration of the whiteness becomes more intense. However, care must be taken in the adjustment of the size of the aperture, as the photogram needs less time under the light because of the repeated exposure. Therefore the aperture must be very small in size so that the white light will not instantly darken the entire image. The second is a sandwich. This is where an already developed photogram is placed over a fresh piece of photographic paper, both under a sheet of glass. This means that an inverted form of the developed photogram appears on the fresh paper. The third is called Polarisation. This is the most complex, as it involves placing the photogram under the white light, then inserting it into the developing fluid, and then very quickly transferring it back to the enlarger and placing under the light once again for the same amount of time it was in the fluid. This should create a silvery line around aspects of the image, because the insides of the white areas will slowly begin to grey.

|
|
|
|
23rd September 2014.
When working with film cameras, there are three things you have to consider. The first is aperture. This is the size of the hole in the lens where the light gets onto the film, its size, therefore, affects the amount of light allowed to create the image, (measured in f/number.) For example a very large aperture would expose the film to a large quantity of light, and a small one, very little. The aperture hole in the lens is formed by a series of metal blades which move in together when the size is adjusted via a turn of this lens. |
The second is shutter speed. This is the amount of time that the shutter stays open, and therefore the amount of time the film is exposed to light. It can be adjusted via a dial located above the shutter release button and is measured in seconds and fractions of seconds. The longer the image is exposed for, the more chance there is for an error to occur, so a crisper image is created the shorter the amount of time. Although too short a time, and the image will be too dark.
This must be altered according to the aperture in order to ensure a balanced image, Eg: the larger the aperture, the shorter the shutter speed required. |
The final thing to consider is the film speed. This is the amount of time it takes for the film to develop, known as the ISO number, ranging from around 25-1000. (International Standards Organisation) The lower the number, the slower the film, and the more light required to develop.
|
This is also true of digital cameras, as on theses too the light and focus is affected by shutter speed and aperture.
For example: in these images aperture has been adjusted. It is clear that as the aperture gets smaller, the images become darker , and the deeper the depth of field becomes. The depth of field refers the distance behind the image remaining in focus as the aperture is changed.
When changing the aperture we can see that the focal point of the image will change, and the depth of field will either expand or retract. (As visible in these images where the forefront becomes clearer.)These photos begin from the widest aperture of f/3 and shrink don to the size f/32, we can see as be go along the images that they decrease slightly in brightness, and the distance behind the model in focus becomes much farther.

|
|

|
|
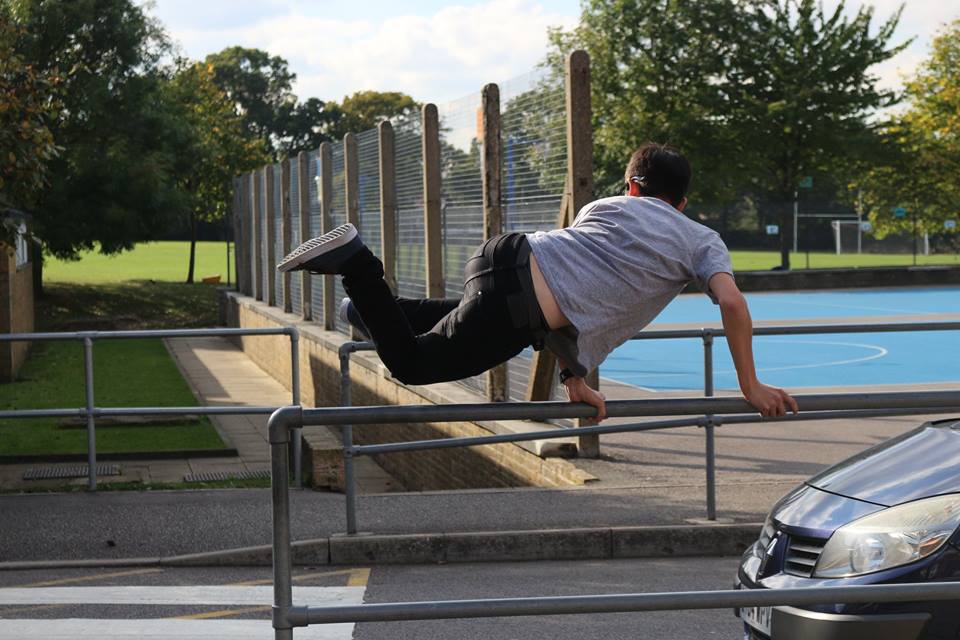
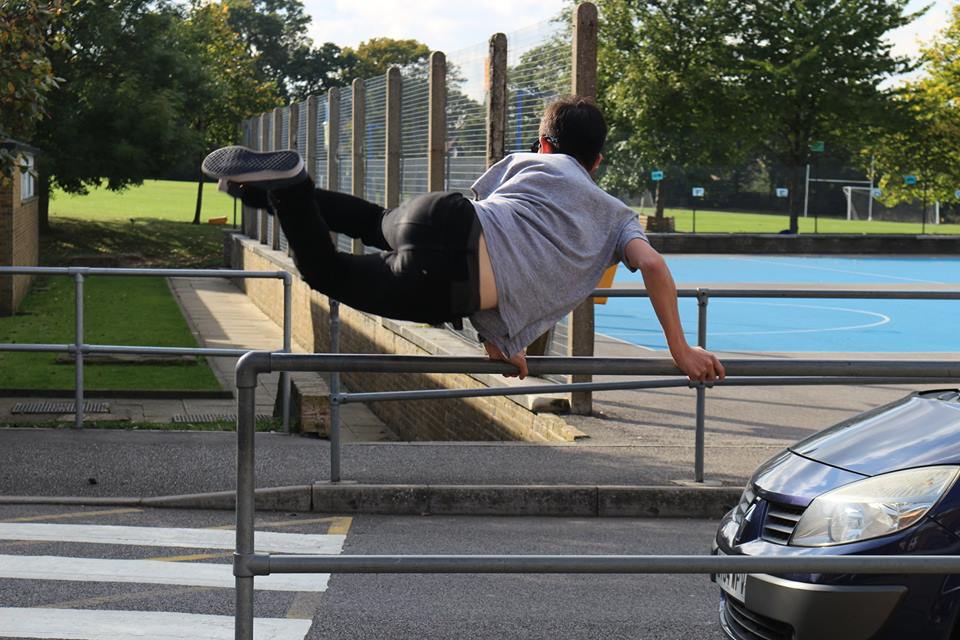
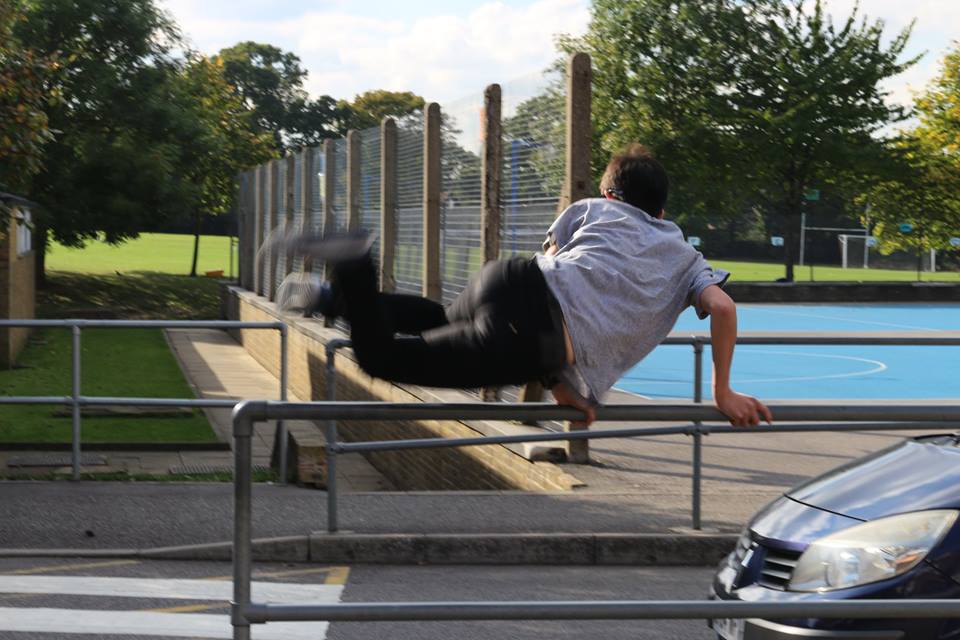
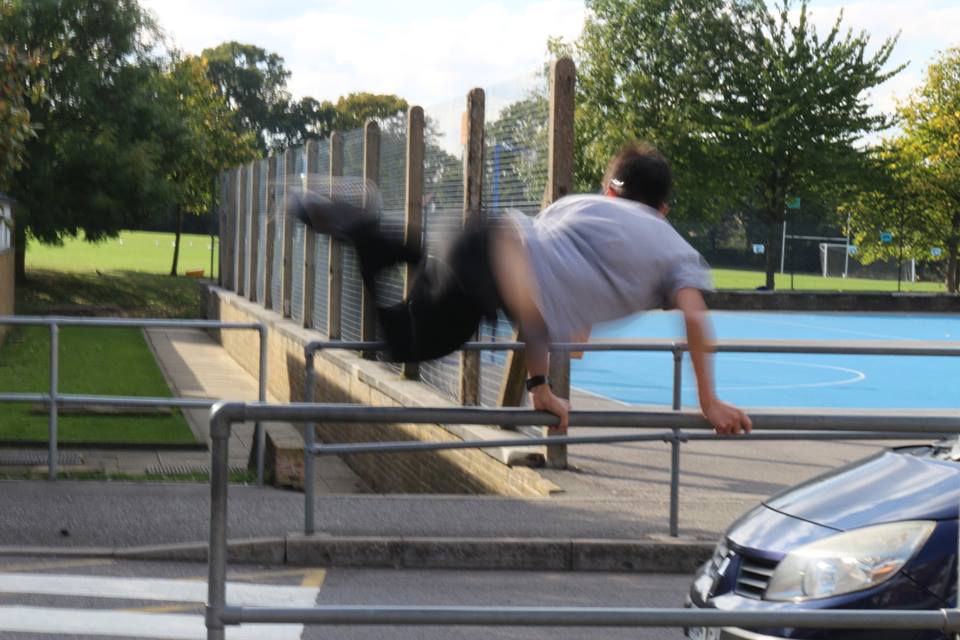
In this set of images the shutter speed was changes, we can clearly see that as the shutter speed was extended, the more difficulty the camera had in picking up a crisp image. This test was done in order to examine the extent to which shutter speed affects the image. The camera is held in one position and the shutter speed is slowly increased at intervals, starting at 1/4000 and extended to one second. The subject becomes blurred and the background becomes overly bright and exposed. In the final image, the subject becomes practically invisible, this is because the camera has attempted to pick up too much information in the window of time it has been given, aka, the camera is exposed to much more light than necessary in order to create the image, therefore it has picked up too much movement and has blurred. In order to get any kind of clarity in an image like this the photographer would have to be completely still so that the camera would pick up absolutely no movement, that is why it is important to have a fast shutter speed when capturing a moving image, or shrinking the aperture size to balance the light intensity. This is due to the aperture size having more effect on the image (letting more light in) as the image is now unbalanced, exposing it to too much light for too long a length of time.
|

|
|
|
|

|
